STEP 1 - Subscribe
Select your HomeScouting Adventure Club subscription. Choose a monthly payment option or subscribe for a year to save! NOTE: Your payment will begin in September for the HomeScouting Adventure club in exactly how many days the "free trial" states is left.
STEP 1 - Subscribe
Select your HomeScouting Adventure Club subscription. Choose a monthly payment option or subscribe for a year to save! NOTE: Your payment will begin in September for the HomeScouting Adventure club in exactly how many days the "free trial" states is left.
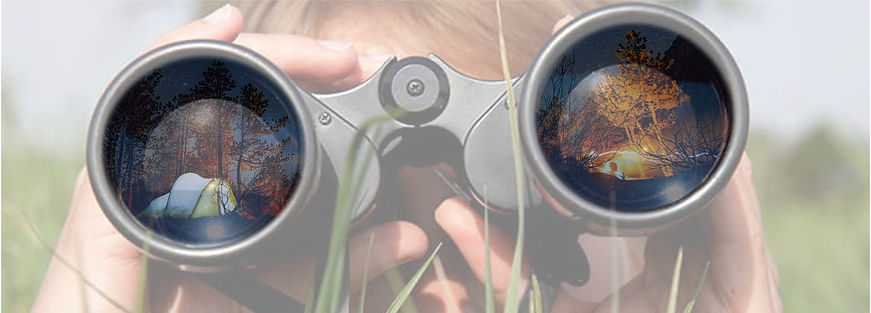


ZoomOut and see more wildlife with your binoculars as you explore nature and discover signs of wildlife in your backyard, along the trail, or in your community. Use one of the HomeScouting Scavenger Hunts to identify 10 signs of wildlife!

If you're not registered for Spring BreakOut, make sure to do that first!
Each week there are three components to completing the weekly challenge - Know, Show, and Go. To complete this week's challenge, do the following:
-
KNOW: Explore the content below to learn about wildlife you might encounter while outdoors, how to prepare for your adventure, and what to take with you.
-
SHOW: Plan your adventure! Gather your gear, determine where you are going, who's going with you, and when you're going. Discuss your plan with your family, den, patrol, or unit.
-
GO: Go on your adventure! Be sure to grab your specific tracking worksheet before you go to record what you complete.
As soon as you're ready, scroll down to get started.
Connected Challenges
Continue this week's challenge by completing additional activities. These activities are optional and just for fun but are connected to this week's theme.
Connected Advancements
You're earning more than just the Spring BreakOut award this week! Click here to grab this week's tracking worksheet and see this week's list of connected advancements
Connected
Trainings
Calling all adult leaders and parents! Not only can you earn the Spring BreakOut Award with your Scout, you can find connected trainings for you to complete along the way.
BEFORE YOU GO OUT
Before you head out on your hike, make sure you have a plan!
The five W’s of a trip plan:
-
Where are you going? Decide on a route to your destination and
back. For backcountry trips, include a copy of a map with your route
marked in pencil. -
When will you return? If you are not back reasonably close to the
time on your trip plan, Scout leaders and family members can take steps
to locate you and, if necessary, provide assistance. -
Who is hiking with you? List the names of your partners. If you need
a ride to or from a trail, write down who will do the driving. -
Why are you going? To fish in a lake? Climb a peak? Explore a new
area? Write a sentence or two about the purpose of your journey. -
What are you taking? Always carry the Outdoor Essentials. If you are
camping out, you may need additional food, gear, and shelter.
LEAVE NO TRACE HIKING
Caring for the environment is an important responsibility of every hiker. The principles of Leave No Trace can help you live up to that responsibility and enjoy the outdoors fully by knowing that you are respecting the environment.
Leave No Trace Principles: As you and your group plan a hike, ask yourselves how you can follow each of the principles of Leave No Trace.
-
Plan Ahead and Prepare. When planning your hike, contact the land managers of the area you intend to visit or the Leave No Trace Center for Outdoor Ethics (see the resources section for contact information). Explain your desired route and ask how you can best implement Leave No Trace. Here are some additional guidelines to remember.
-
Know the regulations and special concerns for the area you will visit.
-
Prepare for extreme weather, hazards, and emergencies.
-
Schedule your trip to avoid times of high use.
-
Visit the backcountry in small groups no larger than parties of four to six hikers.
-
-
Travel on Durable Surfaces. Stay on existing pathways to help protect the surrounding landscape from being trampled, eroded, and compacted.
-
In popular areas, hike on durable surfaces such as established trails, rock, gravel, dry grasses, and snow.
-
Protect shoreline vegetation.
-
Walk single file in the middle of the trail, even if it is wet or muddy.
-
Conduct activities in areas where vegetation is absent.
-
-
Dispose of Waste Properly. Remember this solid guideline: Pack it in, pack it out. Make it easier on yourself by limiting the amount of potential trash you take. Especially important is the disposal of human waste. Use toilet facilities whenever possible. Otherwise, urinate away from trails, camps, and other gathering places. Choose rocks or bare ground; animals may strip vegetation in order to consume the salts left by concentrations of urine. Pack out solid waste, or use a cathole. Check with the land agency for the area you will visit to find out the preferred method. To dig a cathole, choose a remote spot at least 200 feet from camps, trails, water, and dry gullies. With a trowel, dig a hole 6 to 8 inches deep in the topsoil. Take care of business, re-cover the hole, and disguise the site with leaves or other ground cover. Organic material in the topsoil will slowly break down the waste, making it harmless.
-
Leave What You Find. A cluster of flowers beside an alpine trail. Bricks from a historic homestead. A bird’s nest on a low bush. Every hike will bring with it a new discovery to see and enjoy. Here are some reasons why you should leave what you find.
-
Future hikers will have the excitement of discovering for themselves what you have found.
-
Plant and wildlife environments will not be harmed. Leave rocks and other natural objects as you find them. Avoid introducing or transporting nonnative species.
-
Archaeological, cultural, and historic structures and artifacts preserve a record of America’s past; some are sacred to American Indians and other Native Americans. Observe, but do not touch or take.
-
-
Minimize Campfire Impacts. Most hikers are prepared to spend a day outdoors without needing a campfire. If you do expect to cook or get warm, plan ahead with options that do not depend on kindling a blaze. In any case, it is wise to know when a campfire can be lit and when a fire could scar the land. In many areas, fires are discouraged, prohibited, or allowed by permit only. If you must make a campfire:
-
Use established fire rings, fire pans, or mound fires.
-
Keep fires small. Use only sticks from the ground that can be broken by hand.
-
Burn all wood and coals to ash, make sure the ashes are cold out, then scatter the cool ashes.
-
-
Respect Wildlife. Sharing the outdoors with wildlife is one of the great pleasures of hiking. Respect wildlife by always traveling quietly and observing animals from afar. You are too close if your actions cause an animal to change its activities. Always avoid wildlife when they are mating, nesting, raising young, and during other sensitive times.
-
Never feed wild animals. Doing so damages their health, alters natural behaviors, and exposes them to predators and other dangers. Store all your food and trash securely.
-
-
Be Considerate of Other Visitors. Extending courtesy to other outdoor visitors is a natural habit of hikers. Speak softly and respect their desire for quiet and solitude. Leave radios and electronic devices at home. If you carry a mobile telephone for emergency communication, turn it off and stow it in your pack until you need it. Appreciate the company of those you meet on the trail and at campsites near yours. Observe proper trail etiquette. If you encounter horseback riders or pack animals, stop and ask the lead rider what you should do. The lead rider will probably ask you to step a few paces downhill from the trail and stand quietly while the animals pass. If you encounter other hikers or backpackers going uphill when you are going downhill, give them the right-of-way. Step aside on a rock or a log to minimize your impact, and watch your footing when you step below the trail.


THE OUTDOOR CODE
As an American, I will do my best to –
Be clean in my outdoor manners.
Be careful with fire.
Be considerate in the outdoors.
Be conservation minded.
GEAR UP FOR THE OUTDOORS
Clothing is your first line of defense against the elements. It keeps you warm in the winter, cool in the summer, dry in storms, and sheltered from insects, sun, and wind. To help decide what you need, learn about the materials from which clothing is made.
Wool. For generations of backcountry travelers, wool was the fabric of choice. Of course, that’s about all there was for making warm clothing. Wool is still terrific for many coldweather adventures. It is durable and water-resistant, and can help you keep warm even when the fabric is wet. A wool shirt or sweater can ward off the chill of summer evenings, too. Wool is also an excellent choice in hiking socks, hats, and mittens. (If wool irritates your skin, you may be able to wear wool blends or wear woolen layers over clothing made of other fabrics.)
Cotton. Cotton clothing is cool and comfortable. That makes it very good for hot-weather shirts and shorts, especially in dry climates. If cotton becomes wet, though, it loses its ability to insulate, and it may be slow to dry. That can be a real danger on cool days, especially when mist, rain, and wind bring with them the threat of hypothermia.
Synthetics. Outdoor clothing made of nylon, polypropylene, and other manufactured fabrics can be sturdy and comfortable and can maintain warmth even when wet. Look for synthetics in underwear, shirts, sweaters, jackets, pants, mittens, and hats. Lightweight nylon shorts and shirts are ideal for hot weather, drying quickly when wet. Waterproof and breathable synthetic fabrics are used in parkas and rain gear and as the shells of mittens and gloves. Choose layers of clothing that, when combined, will meet the most extreme weather you expect to encounter. On a chilly autumn day, for example, you might set out from the trailhead wearing long pants, a wool shirt, a fleece sweater, mittens, and a stocking hat. As you hike, the effort will cause your body to generate heat. Peel off the sweater and stuff it in your pack. If you are still too warm, loosen a few buttons on your shirt or slip off your mittens and hat. When you are no longer exerting yourself, stay warm by reversing the procedure, pulling on enough layers of clothing to stay comfortable. After the sun goes down, you may want to add an insulated parka and fleece pants or long underwear
No matter what type of outdoor activity you are doing, making sure you are prepared by wearing layers so that you can adjust your clothing to meet changing weather conditions.
Basic Warm-Weather Clothing Checklist
-
T-shirt or lightweight short-sleeved shirt
-
Hiking shorts
-
Underwear
-
Socks
-
Long-sleeved shirt (lightweight)
-
Long pants (lightweight)
-
Sweater or warm jacket
-
Brimmed hat
-
Bandannas
-
Rain gear
-
Appropriate hiking footwear
Basic Cold-Weather Clothing Checklist
-
Long-sleeved shirt
-
Long pants (fleece, wool, or synthetic blend)
-
Sweater (fleece or wool)
-
Long underwear (polypropylene)
-
Socks (wool or synthetic blend)
-
Warm hooded parka or jacket
-
Stocking hat (fleece or wool)
-
Mittens or gloves (fleece or wool) with water-resistant shells
-
Wool scarf
-
Rain gear
-
Appropriate cold/wet weather footwear
OUTDOOR ESSENTIALS
Take the Cub Scout Six Essentials or Scouts BSA Outdoor Essentials with you on every outdoor adventure. The items on the list may help you avoid emergencies, and they can make a pleasant hike even better. At least one person in each hiking group should carry a watch so that you can pace your travels, stick to your trip plan, and return home when you are expected.
Pack. A fanny pack or day pack will hold everything you need during a hike. If you use a small pack to carry
your books to school, it will probably be fine to use for hiking, too.

cub scout
six essentials
-
First Aid Kit
- Flashlight
- Filled Water Bottle
- Trail Food
- Sun protection
- Whistle

scouts bsa outdoor essentials
-
Pocketknife
-
First-aid kit
-
Extra clothing
-
Rain gear
-
Water bottle
-
Trail food
-
Matches and fire starters
-
Sun protection
-
Map and compass
-
Flashlight
Adding some or all of the following items to your emergency kit can come in handy if things went wrong on a hike.
-
Duct Tape. Wrap a length of it around a plastic water bottle and you will always have some handy.
-
Whistle. A whistle can be heard for longer distances than shouting can and requires less energy.
-
Signal Mirror. A metal signal mirror can be slipped into your first-aid kit or a side pocket of your pack. Keep it in its case or slip it inside a spare sock to protect it from becoming scratched and dull.
-
Thin Wire. A few feet of thin wire can come in handy for repairing camping gear.
-
Garbage Bag. A heavy-duty 30- to 39-gallon plastic bag, preferably in a bright color, can be used for emergency rain gear, to protect tinder and kindling from the rain, and to shield your sleeping bag and other equipment.
-
Fishing Line and Hooks. Fifty feet of nylon fishing line can have many uses for making repairs. Add a few hooks and you will have the gear you need to try fishing in lakes and streams.
FOOD AND WATER
Keep your body well-fueled by having a nutritious breakfast before any outdoor activity, and then carrying food that will provide the calories you need throughout. Granola is the good choice. So is GORP—good old raisins and peanuts. Apples, oranges, carrots, and bananas are fine snacks, too. A solid lunch will see you through the middle of the day. Sandwiches, fruit, carrots, nuts, and raisins are all tasty. Instead of sandwiches, you might try crackers with cheese or peanut butter. Water is even more important than food though. Fill at least one water bottle before you start out, and sip from it often. In hot weather, you may need to carry several water containers. Treat any water taken from streams, lakes, or springs before you drink it.
POCKETKNIVES
A pocketknife is a useful tool to have with you, but it can also be dangerous if you don't know how to use it the right way. Learn about three different types of pocketknives and some basic pocketknife safety. REMEMBER: only Bears, Webelos, Scouts, Venturers, and adults are permitted to use pocketknives after a Whittling Chip is earned.
The jack knife is only hinged on one end, but it may have more than one blade. Outdoorsmen
such as hunters, campers and fishermen tend to like these knifes.
The pen knife has hinges and blades on both ends of the knife. Often, they
will have two or three blades at each end. They are also smaller than the other
two types.
The multi-purpose knife is popular because there are so many different things they can
have on them. Obviously, they'll have a knife blade, but they can also have a file, scissors,
tweezers, can or bottle openers and even a mini-saw blade.
KNIFE SAFETY RULES TO LEARN AND LIVE BY
-
A knife is a tool, not a toy.
-
Know how to sharpen a knife. A sharp knife is safer than a dull knife because it is less likely to slip and cut you.
-
Keep the blade clean and dry.
-
Never carry an open pocketknife.
-
When you are not using your knife, close it using the palm of your hand and put it away.
-
When you are using the cutting blade, do not try to make big shavings or chips. Cut slowly and steadily.
-
Make a safety circle. Before you pick up your knife to use it, stretch your arm out and turn in a circle. If you cannot touch anyone or anything else, it is safe to use your knife. While using your knife, be sure to watch in case someone walks toward you and gets too close. If that happens, put your knife away until it is safe to continue.
-
Always cut away from you, never toward you.
-
Never hand a knife to someone else blade first. Learn and use the “eye contact” method of handing a knife to someone else. Do not release the knife until the other person makes eye contact with you and acknowledges he has the knife.
-
Never use a knife on something that will dull or break it.
-
Never throw a knife for any reason.
-
Always think before you cut. Do not use your knife to strip bark from a tree or to carve your initials into something that does not belong to you.


While on your outdoor adventure, use one of our HomeScouting Scavenger Hunts to see what you can find in the wild! Click on one of the Scavenger Hunt's below to download!


WHILE YOU'RE OUT - BE PREPARED
BEING PREPARED AS A GROUP
Many people keep things to themselves. They don’t want to hold up the team or are
worried about what others will think of them. An important step in avoiding backcountry
emergencies is letting your companions know when you are having a hard time or if you
are aware of something that might affect you or the group. Remember, stopping for a few
moments to deal with a hot spot on a heel can avoid bringing the group to a long halt later
in the day when blisters break out. Saying something about changing weather or asking
questions about the route that group leaders have chosen can bring important matters to the attention of the rest of your group and help everyone make good decisions.
Buddy System
"Two heads are better than one." You may have heard that saying before and it is true. Sometimes you may forget a safety rule, or not be aware of a hazard up ahead, but if you are with a buddy, it is easier to stay safe. The buddy system is a great way for Scouts to look after each other. especially on outdoor adventures. When you go hiking, swimming, or camping, you should be assigned a buddy. You keep track of what your buddy is doing, and your buddy knows at all times where you are and how you are doing. The buddy system is a way of sharing the good times and keeping everyone safe. If you and your buddy find yourself away from the rest of the group, make sure to follow the S-T-O-P rules below.
BEING PREPARED YOURSELF
Most important is how you think about things when you are confronted with a survival situation. Learn the right things to do at the right time, then practice these techniques until you know them by heart, and you will build your confidence in dealing with wilderness emergencies.

S-T-O-P
The moment you think you might be lost, stop immediately. If you ever feel fear, stop immediately. Put your hands in your pockets and take a deep breath. Look around and really see what is happening. If there are immediate dangers to avoid—a potential avalanche, a capsized boat, an approaching bear—do what you must to keep yourself and others safe. You might need to put on your rain gear or step around a tree to get out of the wind. You might also need to provide first aid for life-threatening injuries or illnesses. Once that is done, you can begin to figure out what to do next.
The letters of the word STOP hold a special meaning for
staying positive and beginning to take charge of a situation.
-
Stop / Stay Calm
-
Think
-
Observe
-
Plan
Stop/Stay Calm. At the beginning of a wilderness survival emergency, the most important thing you can do is stop. Once you have taken care of your immediate safety and that of others in your group, then relax as best you can. Drink some water. Eat a snack. You have time. You have resources. You have a good mind. Now is the time to start using it.
Think. Assemble the group. Use your brain to figure out what is really going on. If you think you are lost, study your map and try to determine where you are. Look around for landmarks. Note the contours of hills, ridges, or mountains, and where you are in relation to streams or lakes. If you don’t have a map, try to remember where you could have gotten off course. What was the last landmark you positively identified? In what direction did you travel from there? If you are on a trail or a road, can you follow it back to your starting point? If you have left footprints in snow, can you retrace your tracks? Don’t go anywhere yet. There is no rush.
Observe. Assess the immediate situation. Does anyone need additional first aid? What are the weather conditions? Where is a good place to take shelter? Inventory everything you have in your pack and pockets, and look around to get a sense of the natural resources nearby. What clothing do you have? How can you improvise with what is available to make it suit your needs? Don’t go anywhere yet. There is no rush.
Plan. When you have figured out what your situation really is, the group can put together a plan for what to do next. Build your plan on what you have observed, what you have in the way of equipment, what you can improvise from native materials, and how you can keep yourself safe. Put into practice the survival steps you have learned, and wait as calmly as you can for help to arrive. Plan carefully and cautiously; don’t make your situation worse by acting hastily. If you left a written trip plan with a responsible person before leaving home, your failure to return on time should trigger a search effort. Most people are found within 24 hours of becoming lost or encountering difficulties in the backcountry. You could, if you had to, survive much longer.
LION ALTERNATIVE - SAW
S = Stay Put
A = Answer (if you hear your name)
W = Blow your Whistle
SAFETY TIPS AROUND ANIMALS
SAFETY AROUND DOGS
It is not unusual to come upon dogs as you walk through cities, towns, and near
farms. You may meet them on trails, too. Since you are a stranger to them, they
might snarl and bark at you. Avoid eye contact; talk to the dogs you encounter
in a calm, quiet voice and give them plenty of room as you pass. Do not
threaten them, but if you have a hiking stick or trekking poles, keep them
between you and the animals. Cross to the far side of the road or trail if you
can, or avoid a dog’s territory by taking another route.
SAFETY AROUND WILD ANIMALS
Seeing deer, raccoons, skunks, squirrels, and other animals that make their homes in the outdoors is a special part of any hike. If wild animals must alter their normal habits, you are too close. They are not likely to become aggressive unless they feel threatened. Enjoy watching wild animals, but keep your distance. Do not disturb nests or burrows.
Be aware of the kinds of predatory animals you might meet during your adventures. Wolves, coyotes, and cougars (mountain lions, panthers, pumas) are curious. If you meet such an animal, do not approach the animal, run, or play dead. Face the creature and slowly retreat. Make yourself “big”—wave your arms and clothing above your head. Be noisy; throw rocks and sticks. If you encounter a bear, do not run or shout. Stay calm, back away, and avoid eye contact with the animal.

VENOMOUS REPTILES
Snakes and other reptiles will usually get out of your way when they see you coming. But if you stumble over one, it may bite. Fortunately, most snakes and other reptiles don’t have poison in their bites. Here are the few that do.

Gila monster: Found in parts of Nevada and Utah and down into Mexico

Eastern diamondback rattlesnake: Found along the Atlantic coast from North Carolina to Florida and west to Louisiana

Western diamondback rattlesnake:
Found in the southwestern United States, from Missouriand east Texas to southern California

Prairie rattlesnake: Found in the western half of the United States

Sidewinder or horned rattlesnake: Found in the deserts of the Southwest

Coral snake: Found in some Southeastern states and in southern New Mexico and Arizona

Copperhead: Found in most Southern states, but also as far north as Massachusetts and as far
west as Illinois and Texas

Water moccasin (cottonmouth): Found in or near water from southeastern Virginia to Florida to east Texas and up through Arkansas and parts of nearby states
DANGEROUS INSECTS
Snakes and other reptiles will usually get out of your way when they see you coming. But if you stumble over one, it may bite. Fortunately, most snakes and other reptiles don’t have poison in their bites. Here are the few that do.

Bees, hornets and wasps: Most flying insects are just annoying, like mosquitos. A few of them can be dangerous for people with bad allergies. If someone gets stung by a bee, hornet, or wasp and has trouble breathing, it’s important to seek medical help right away. People who know they are allergic to insect stings usually carry special medicine called epinephrine with them all the time. If you carry this medicine with you, be sure your leader knows about it!
Ticks: Ticks are hard-shelled insects that like to bury their heads in your skin. (Yuck!) You should check yourself for ticks when you’ve been in the woods. If you find one, have an adult gently pull it out with tweezers. Wash the area with soap and water and put antiseptic medicine on it.


Chiggers: Chiggers are too small to see, but they can cause big itches when they burrow into your skin. Don’t scratch chigger bites; cover them with calamine lotion or special chigger medicine, such as 1 percent hydrocortisone ointment.
Spiders: Some spiders, especially the black widow and brown recluse, can make you sick if they bite you. Symptoms can include redness and pain at the bite site and also fever, chills, nausea, vomiting, joint or muscle pain, and cramps. Anyone who has been bitten by a spider should see a doctor as soon as possible.

POISONOUS PLANTS
Most plants are beautiful and harmless, and most animals are more afraid of you than you are of them. However, you should be aware of the poisonous plans and dangerous animals that you might see on the trail - even in a city park or neighborhood.
Here are the most common poisonous plants. If you touch them, your skin may get red and itchy. You can prevent a reaction by washing with soap and water as soon as possible.
Poison Ivy.
Poison ivy grows throughout most of the continental United States as either a shrub or a vine. Look for leaves with three leaflets and maybe white berries.
Poison Oak.
Poison oak grows as a low shrub in the eastern U.S. and as clumps or vines on the Pacific coast. Look for clusters of three leaves and possibly yellow-white berries.
Poison Sumac.
Poison sumac grows as a tall shrub or a small tree in wet areas in the northeastern, midwestern, and southeastern United States. Look for leaves with seven or more leaflets and possibly yellow-white berries.
To avoid poison ivy and poison oak, remember this rhyme: "Leaves of three, let it be; berries white, poisonous sight"


LOCATE WHERE YOU LIVE

A map is a drawing or sketch of an area or country. Explorers have used maps since ancient times to travel from one place to another. We use maps every day. You may have used a map to locate a trail you hiked with your family. Now it’s time to get to know your town better and the area where you live! You can find a map of your city or town at a public library, the local convention and visitor’s bureau, or the chamber of commerce. You can also print out a map of your area from the Internet.
Some online map programs might also allow you to see a satellite image of your street and zoom in on a picture of your home. You can find the location of your home by typing in your street address with your parent or guardian’s help. Your home will not be pictured on a regular city or town map, though.
HOW TO FIND YOUR HOUSE ON GOOGLE EARTH:
-
Type in your address in the Search bar
-
Locate your house!
Then, draw a map for a friend so he or she can locate your home, a park, a school, or other locations in your neighborhood. Use symbols to show parks, buildings, trees, and water. You can invent your own symbols. Be sure to include a key so your symbols can be identified. Maps have lines, symbols, and colors. A key, or legend, tells you what those symbols and colors mean.
Using the key, locate different symbols on the map. What symbols did you find? Now make a map of your neighborhood. Include your home, your school, or other locations you choose. Make up your own symbols to show parks, buildings, and bodies of water nearby. Be sure to mark the streets and landmarks on your map so a friend could easily find the location you selected.
DRAW YOUR OWN MAP
MATERIALS NEEDED
-
Paper
-
Colored Pencils / Markers / Crayons
-
Optional: Ruler
DIRECTIONS
-
The first decision is what to include on the map. Use your neighborhood and surrounding landmarks. Focus on the major landmarks in the area you're mapping. Places like your home, the road, neighbors' houses, stop signs, etc. are perfect examples.
-
Begin to put those landmarks on the map! Start by drawing a compass rose to indicate north, south, east and west on the map. Position the paper to line up with the actual directions. This makes it easier to put the landmarks in the appropriate spots. Decide on symbols for different landmarks. A square might indicate a building in the neighborhood, for example. A circle might represent trees. Start by drawing a representation for a prominent landmark. Make sure to keep in mind the proportion of the objects on the map. A fire hydrant shouldn't be as large as the house, for example.
Use the maps below as examples! Click on them to enlarge.


ASSEMBLE A FIRST AID KIT


When you’re hiking, you have to take care of any minor emergencies that come up. The Scout motto is “Be Prepared.” One way to be prepared is to carry a first-aid kit whenever you go hiking.
What are some minor emergencies you might encounter when on a hike? What items should you take along to handle these emergencies?
Put together a personal first aid kit containing the items below, but also the items you identified above.
Personal First-Aid Kit
Include these items for a personal first aid kit to carry on Scouting outings:
-
Adhesive bandages
-
Moleskin
-
Antibiotic ointment
-
Latex-free gloves
In addition to the basic items to the left, consider including:
-
Gauze pads
-
Adhesive tape
-
Soap
-
Scissors
-
Mouth barrier
-
Pencil and paper
-
Antiseptic wipes

COMPASS TREASURE HUNT
It’s time to have some fun using a compass! A parent, leader, or older Scout will place an object or objects nearby for you to find. Then he or she will give you directions for using the compass to locate them. First, find north on the compass and line up your body so you are facing north. Someone will give you directions to an object from the position where you are standing. Using the compass, follow the directions to get to the hidden object. Good luck on your scavenger hunt!
MATERIALS NEEDED
-
compass
-
paper and marker to write instructions.
-
treasure
HOW TO MAKE A COMPASS TREASURE HUNT:
An adult or older Scout will need to map out your course.
-
The course can be located anywhere: the park, backyard, or in your
house! It can be as simple or complex as you want, but should be scaled
in difficulty to the ages of everyone involved. -
Standing at the starting point, look around in the distance for a
hiding place for the first little treasure and next clue: behind a tree,
-
hanging from a branch, behind the garage … Hold the compass and check to see that it’s level enough for the needle or card to spin freely. Wait till it points steadily in one direction, and turn the compass so “N” lines up with the pointer.
-
Now hold the compass in front of your face, and turn it until the needle points to North. Look to the hiding spot, then look down to the compass and read the “degrees” which point to the spot. (This method is simple, but not “pinpoint” accurate. Keep the next clue reasonably easy to locate).
-
Walk to the first hiding spot and count your steps along the way. Be sure to take the same size steps as the players would. Write down the number of steps and the course (in degrees) on a small piece of paper. This is the clue you’ll give the players at the start.
-
Repeat the process for the next clue: look for a hiding spot, take a compass bearing, count the steps, and write it down. Once you’ve finished plotting this second clue, you have to backtrack to the first clue location and leave the note with compass bearing and # of steps to the spot you just plotted. Don’t forget to leave a few treats to keep the players enticed.
-
Create as many waypoints as you like, but make enough so that each player gets a turn. The final “treasure” can be buried, hidden, or covered, but where all can access it together. (Not up a tree!) It can even lead right into your house where the birthday cake is waiting as the treasure.
-
Remember, kids have shorter distances in-between steps than adults, so take small steps.
-
Make it fun! Add instructions like spinning, jumping, climbing and more after they finished counting their steps. It breaks everything up and keeps them guessing and excited for not just the treasure at the end, but the hunt to get there.


Below you will find details on connected advancements for this week's challenge.
If there is a Trail Waypoint next to the advancement, that means you fully earn this adventure along The Trail! Here you will find connected worksheets, tracking tools, and full details on how to complete the adventure.


TRAIL WAYPOINTS
FOR CUB SCOUTS

LIONS - Current Kindergarteners (as of April 2021)
-
Mountain Lion (Required Adventure) - Get prepared for a hike and demonstrate what to do if you get lost from the group on your hike and learn about respecting nature.


TIGERS - Current 1st Graders (as of April 2021)
-
Tigers in the Wild (Required Adventure) - Go on a hike and gather the
Cub Scout Six Essentials for your hike. Make sure to carry your own gear! Look for wildlife along the way. -
My Tiger Jungle (Required Adventure) - Take a 1-foot hike and discover nature in your backyard.

WOLVES - Current 2nd Graders (as of April 2021)
-
Paws on the Path (Required Adventure) - Show you are prepared for a hike by collecting the Cub Scout Six Essentials and take a one-mile hike with your den or family.
-
Finding your Way (Elective Adventure) - Use a map and learn about where you live and take a walk or a hike with your family. You can even create a scavenger
hunt!

BEARS - Current 3rd Graders (as of April 2021)
-
Fur, Feathers, and Ferns (Required Adventure) - While hiking for one-mile, observe signs of animals that might live there.
-
Bear Necessities (Required Adventure) - Go on an outdoor activity with your den or family and prepare for the adventure.

WEBELOS & ARROW OF LIGHTS - Current 4th & 5th Graders (as of April 2021)
-
Webelos Walkabout (Webelos Required Adventure) - Go on a three mile hike and assemble a first aid kit and a nutritious snack for your hike.
-
Outdoor Adventurer (Arrow of Light Required Adventure) - Go on a hike with your den or family and practice the Outdoor Code and Leave No Trace.
-
Into the Woods (Elective Adventure) - Learn about different trees and take a walk around your neighborhood to identify useful things made from wood.
FOR SCOUTS BSA & VENTURING

While you'll need to work with your troop leadership to fully complete the rank requirements below, you can practice while completing this week's challenge!

SCOUT RANK
-
Tell what you need to know about pocketknife safety.
-
Repeat from memory the Outdoor Code. In your own words, explain what the Outdoor Code means to you.
-
Work on the Exploration Merit Badge along The Trail!

TENDERFOOT RANK
-
Describe common poisonous or hazardous plants; identify any that grow in your local area or campsite location. Tell how to treat for exposure to them.
-
Show first aid for the following: Bites or stings of insects and ticks and venomous snakebites
-
Assemble a personal first-aid kit to carry with you on future campouts and hikes. Tell how each item in the kit would be used.
-
Explain the importance of the buddy system as it relates to your personal safety on outings and in your neighborhood. Use the buddy system while on a troop or patrol outing.
-
Describe what to do if you become lost on a hike or campout.
-
Work on the Exploration Merit Badge along The Trail!

SECOND CLASS RANK
-
Explain the principles of Leave No Trace and tell how you practiced them on a campout or outing. This outing must be different from the one used for Tenderfoot requirement 1c.
-
Identify or show evidence of at least 10 kinds of wild animals (such as birds, mammals, reptiles, fish, or mollusks) found in your local area or camping location. You may show evidence by tracks, signs, or photographs you have taken.
-
Using a compass and map together, take a 5-mile hike (or 10 miles by bike) approved by your adult leader and your parent or guardian.
-
Describe some hazards or injuries that you might encounter on your hike and what you can do to help prevent them.
-
Demonstrate how to find directions during the day and at night without using a compass or an electronic device.
-
Work on the Exploration Merit Badge along The Trail!

FIRST CLASS RANK
-
Using a map and compass, complete an orienteering course that covers at least one mile and requires measuring the height and/ or width of designated items (tree, tower, canyon, ditch, etc.).
-
Demonstrate how to use a handheld GPS unit, GPS app on a smartphone, or other electronic navigation system. Use GPS to find your current location, a destination of your choice, and the route you will take to get there. Follow that route to arrive at your destination.
-
Identify or show evidence of at least 10 kinds of native plants found in your local area or campsite location. You may show evidence by identifying fallen leaves or fallen fruit that you find in the field, or as part of a collection you have made, or by photographs you have taken.
-
Work on the Exploration Merit Badge along The Trail!


STAR AND LIFE RANKS
-
Work on the Exploration Merit Badge along The Trail!

FOR PARENTS AND ADULT LEADERS


All direct contact leaders must complete Hazardous Weather Training to be considered position trained. And here is one story about why this is so important.
Imagine as a leader with a group of excited Scouts you arrive at a council camp for a
camporee on a rainy Friday afternoon. Saturday morning is filled with the sounds of
Scouts participating in the scheduled activities, only to have the weather turn
blustery with sustained winds of about 30 mph and gusts up to 48 mph. The trees of
the heavily forested area start swaying madly back and forth. As a leader, what would
you do? Would you continue with the camporee or evacuate the camp?
This was exactly the situation experienced earlier this year at Pacific Harbors Council’s Klondike Derby held at Camp Thunderbird. Accrding to the National Weather Service, sustained winds of about 30 mph with gusts up to 48 mph were recorded near the camp between 7 a.m. and 3 p.m. Saturday. It soon became apparent to leaders that conditions had become unsafe and, around midmorning, with input from the council representative and Camp Thunderbird’s ranger, leaders decided to evacuate the camp.
“We made sure that we followed the Boy Scout Guide to Safe Scouting and our hazardous weather training to ensure that all scouts and adults made it home safe,” said Barb Dyer, Klondike committee chairwoman. “It was the right decision to cancel Klondike. While it’s disappointing that the boys couldn’t have the fun-filled weekend that was planned, I’m eternally grateful that safety is first with the BSA.”
A good decision it was, as several large trees and branches dropped on or near Scout campsites during the storm. No injuries were reported, but it could have turned out differently. Rebecca Ledford, an adult leader with Troop 4100, shared a photo of her son’s tent, which had been impaled by a heavy fallen branch — right where his pillow was.
On Sunday morning the “all clear” was given for scouts and leaders to return to retrieve their belongings and break down their campsites.

TAKE THE TRAINING
-
Log in to my.scouting.org
-
Click on BSA Learn Center to access a full list of trainings
-
Click on Program Safety under Expanded Learning to find the Hazardous Weather Training.
FIND SUPPLEMENTAL TRAINING AT LEADSCOUTING.ORG

Join more than 1,000 other adult volunteers from around the world at www.LEADScouting.org for Baden Powell Institute throughout the spring! BPI is a premiere training event providing courses that spark innovation, imagination, and inspiration. You’ll have immediate access to the entire course catalog of 30+ classes on an interactive virtual campus and receive a package in the mail! We’ve designed this program to meet your needs with all classes digitally delivered and on demand – tune in on your time, and get the training you need.

ZoomOut and see more stars with your telescope as you explore the night sky and discover what lies beyond. Thousands of stars, constellations, planets, the moon, satellites, airplanes, and birds are above your head every night. Have a Star Party with your family for this week's challenge and use the worksheet below to identify what you see.

Each week there are three components to completing the weekly challenge - Know, Show, and Go. To complete this week's challenge, do the following:
-
KNOW: Explore the content below to learn about space exploration, what lies beyond the night sky, and how to prepare for your family's Star Party!
-
SHOW: Plan your adventure! Gather your gear, determine where you are going, who's going with you, and when you're going. Discuss your plan with your family, den, patrol, or unit.
-
GO: Have a Star Party! Be sure to grab your specific tracking worksheet before you go to record what you complete.
As soon as you're ready, scroll down to get started.
HAVE A STAR PARTY!
There are so many exciting things to see in the night sky. Thousands of stars, constellations, the Milky Way, planets, the moon, satellites, and airplanes over head every night. We can see old stars dying and exploding. We can see meteor showers, or shooting stars. Sometimes it is rare to see some of these sights. But on any clear night of the year, you usually can see the Moon and a dazzling array of stars. Did you know that the sky changes as the seasons change? The earth rotates and tilts back and forth. This makes the night sky different in each season.
You can see many constellations and planets in the night sky without a telescope. Pick a night to head outside, find a place that is dark enough to see the night sky. Make sure to pick a clear night when there is no cloud cover! Then create your own constellation and share it with your family!
GETTING READY TO OBSERVE
Know how to protect yourself before you go out to observe the night sky!

PROTECT YOUR BODY
When you go stargazing, dress appropriately for the weather - hot or cold. To help protect yourself against bites and stings when you go outside, wear clothes that cover all exposed skin. Wear shoes or boots - not sandals - and socks. Insect repellent sprayed on your body, clothing, and shoes provides added protection.
Did you know?
It takes about 30 minutes for your eyes to adjust to darkness. To help preserve your night vision, use a red filter with your flashlight. You can do so by securing a piece of red cellophane over any flashlight.
MOVING IN THE DARK
During the day before a stargazing outing, survey the area will you will be observing. Look for holes, crevices, or other large rocks or tree roots that you might not see at night. Take care to avoid these hazards when you return at night to observe the night sky.
PROTECT YOUR EYES
Never stare directly at or near the Sun, even for a few moments and never look at the sun through binoculars or a telescope unless your equipment has the proper solar filters. Looking directly at the sun, even with sunglasses, can cause permanent blindness or other damage to your eyes that might not be immediately noticeable.
Sunburns
Sun exposure can catch you by surprise when you are outside, preoccupied with setting up your equipment or viewing a solar eclipse. Apply sunscreen with a sun protection factor (SPF) of at least 15 to exposed skin. Don’t forget your ears & the back of your neck. Reapply often.
HEAT EXHAUSTION & HEATSTROKE
Heat exhaustion occurs when the body overheats because its cooling methods fail. Watch for these signs: body temperature between 98.6 and 102 degrees; skin pale, clammy, and sweaty; nausea, dizziness, and fainting; pronounced weakness and tiredness; headache; muscle cramps. To treat heat exhaustion, lay down in a cool spot with feet raised, loosen clothing, apply a cool damp cloth to the skin or use a fan, and sip cool water.
Heatstroke is life-threatening because the body's heat control system has been overworked and overwhelmed, resulting in its failure. Signs include body temperature above 102 degrees; red, hot, and dry skin; extremely rapid pulse; confusion or disorientation; fainting or unconsciousness; convulsions. Cool the victim immediately. Place the victim in a cool spot face-up with head and shoulders raised. Remove outer clothing, sponge the bare skin with cold water, and soak underclothing with cool water. Apply cold packs, use a fan, or place the victim in a tub of cold water. Dry the skin after the body temperature drops to 101 degrees and obtain medical help immediately.
HYPOTHERMIA
Hypothermia occurs when the body’s core temperature drops so low that it is no longer able to keep warm. The key to preventing hypothermia is to keep warm and stay dry, and—if you will be outside for extended periods—eat plenty of energy foods (nuts, dried fruits, peanut butter). Don’t push yourself to a dangerous point of fatigue.
In cold weather, wear layers to keep in the heat. Bring along a woolen cap, scarf, gloves, extra socks, and a coat. Keep your arms and legs covered. Always carry rain gear.
DEHYDRATION
Dehydration is caused by lack of water in the body. A person who gives off more water than consumed can become dehydrated—in hot or cold weather. Everyone should stay well-hydrated while in the outdoors. Do not wait to drink until you feel thirsty.
You can observe objects in the night sky with your unaided eye.
However, with binoculars or a telescope, the images you see will appear
brighter and larger.
BINOCULARS
Binoculars are perfect for stargazing. They collect more light than the human eye, so you can see 50 times more stars with 10 x 50 binoculars. They also improve the clarity and intensify the colors of the stars you see. Unlike a telescope, binoculars allow you to use both eyes to view. Binoculars show an image the right way up, whereas telescopes show objects upside down. Binoculars are easy to transport and less expensive than many telescopes.
-
Some giant binoculars have lenses of 70 millimeters or more and magnifications of 15x to 20x. Wider lenses allow you to see more stars, but these giant binoculars are so heavy that they must be mounted on a tripod, like a telescope, for viewing.
TELESCOPES
Like binoculars, telescopes gather more light than the human eye. The two main types of optical
telescopes— those that collect visible light—are refracting and reflecting, with a third type, the
catadioptric, that combines features of the refractor and the reflector.
-
Refracting telescopes use a system of lenses. At the large end of the telescope, the objective or front lens collects and focuses light. The eyepiece, the smaller lens you look through, is at the other end. Refracting telescopes produce sharp images.
-
In the reflecting telescope, a concave (bowl-shaped) mirror at the base of an open tube collects and reflects light to a second, smaller mirror near the top of the tube. The eyepiece magnifies the image that the mirrors have formed. The reflector is the most common type of telescope and a popular choice for backyard astronomers.
-
The catadioptric telescope, also called a refracting-reflecting telescope, combines a large front lens with two mirrors. It has a short, enclosed tube and is often portable.
Did you know?
Because of their wide field of view, binoculars are perfect for studying the surface of the Moon, scanning the Milky Way, spotting Jupiter’s large moons, and viewing star clusters. An ideal size is 10350, which means the image is magnified 10 times and the main lenses are 50 millimeters in diameter. The 8340 and 7335 are also good choices.


TOOLS OF THE TRADE
Refracting Telescope
Reflecting Telescope
Before you go stargazing, find out what planets and constellations you can see from your location on Earth! A good place to look for this information is at www.earthsky.org/tonight. Find out which planets and stars are out right now.
CONSTELLATIONS
Sailors and travelers have used the stars for hundreds of years to find their way both on land and at sea
because some constellations are visible any time of the year. These constellations are known as
circumpolar because they never set below the horizon. As Earth rotates on its axis, the stars seem to
circle a point called the celestial north pole. The north pole itself points to Polaris, or the North Star.
Because of this, people can figure out which direction they are traveling just from one star! Finding Polaris,
or the North Star, will be a big help in locating the four main circumpolar constellations.
To find this star, first look for the group of stars called Ursa Minor, or the Little Dipper. The Little Dipper looks like a spoon with a long handle. The North Star is located at the end of the handle of the Little Dipper.
Additionally, the Big Dipper is part of Ursa Major (the Great Bear), a constellation that includes a few less-visible stars. The outer stars on the bowl of the Big Dipper always point to Polaris. Every six hours, the Big Dipper appears to have moved a quarter of the way around the North Star.
The other two main circumpolar constellations are Cassiopeia and Draco:
-
Cassiopeia. If you follow the line from the middle star of the Big Dipper’s handle through Polaris, you will find Cassiopeia. Its five main stars form an M when they’re above the North Star and a W when they are below it.
-
Draco. Draco, the dragon, winds around Polaris between the Big and Little Dippers. None of its more than 80 visible stars is very bright; the four stars that form the dragon’s head are easiest to see.
Some constellations are visible in the night sky only at certain times of the year. Twelve seasonal constellations known as zodiacal constellations are centered on the ecliptic, the path that the Sun, the Moon, and the planets all appear to follow through the sky. The zodiacal constellations you can see at night—Aries, Taurus, Gemini, Cancer, Leo, Virgo, Libra, Scorpius, Sagittarius, Capricornus, Aquarius, and Pisces— change as Earth follows its yearly path around the Sun.
Spring Constellations
-
Leo. You can see Leo, the Lion, from January through June. From the two stars of the Big Dipper’s bowl that are not used to point toward Polaris, follow with your eye a line straight down to Leo’s brightest star,Regulus.
-
Virgo. Virgo, the Virgin, is the largest constellation and is visible from April through July. If you look from the handle of the Big Dipper through Arcturus (a bright star in the constellation Boötes), you will see another bright star. This is Spica, the bottom of Virgo’s Y shape.
-
Libra. Libra, the Balance Scale, is a late-spring constellation with four fairly dim stars. It is one of the most difficult zodiacal star patterns to spot. Look between Spica and the southeastern horizon.
-
Cancer. Cancer, the Crab, is visible from January to May, but it is the faintest constellation in the zodiac. To find it, follow a line from Leo’s Regulus to the Gemini constellation (a winter constellation described below). Cancer is between Leo and Gemini.
Summer Constellations
-
Lyra. You can see Lyra, the Lyre, from May through November. In late summer at about 10 p.m., if you look straight up, you may see a very bright blue-white star. This star, Vega, is Lyra’s brightest star.
-
Cygnus. Often called the Northern Cross, Cygnus the Swan is visible from June through November. Follow a line from Vega slightly east to another star, Deneb, that is almost as bright. Deneb is Cygnus’s brightest star.
-
Aquila. The somewhat triangular grouping in the summer sky south of Lyra and Cygnus is Aquila, the Eagle. Its brightest star is Altair, which forms the Summer Triangle with Deneb and Vega.
-
Scorpius. In July and August, you can see Scorpius, the Scorpion, very close to the southern horizon. Its brightest star is Antares, a red supergiant star near the scorpion’s head.
-
Sagittarius. In July and August you can see Sagittarius, the Archer, just east of Scorpius. Its main stars form a pattern that resembles a teapot. When you look at Sagittarius, you’re looking toward the center of the Milky Way galaxy. Scorpius and Sagittarius may be difficult to view if you live in the North.
Autumn Constellations
-
Pegasus. Pegasus, the Flying Horse, is best seen from August through October, southeast of Cygnus. Part of the constellation is known as the Great Square, an easy shape to recognize.
-
Andromeda. Pegasus shares one of its stars with Andromeda, which is visible from September to January. Look eastward from the Great Square of Pegasus. The Andromeda galaxy—the most distant object visible to the naked eye—is visible on clear nights as a faint, misty spot in the Andromeda constellation.
-
Perseus. You can see Perseus in the autumn and winter, east of Andromeda. It lies between the constellations of Auriga (described below) and Cassiopeia. Perseus contains the double star Algol. As the stars of Algol pass in front of each other, Algol appears alternately fainter and brighter.
-
Aries. Three fairly bright stars make up the main part of Aries, the Ram. It appears south of Andromeda from October through March. Pisces. The main part of Pisces, the Fishes, is a string of stars below Andromeda and Pegasus. Pisces appears in the sky from October to December, but it is faint and can be hard to find.
-
Capricornus. Look straight down from the star Altair in Aquila. Capricornus, the Sea Goat, is a faint constellation, but when visibility is good you can see it from August through October.
-
Aquarius. On dark, clear nights from August through October, you may be able to see Aquarius, the Water Bearer, south of Pegasus. One end of Aquarius stretches above Capricornus and the other is below the Circlet of Pisces.
Winter Constellations
-
Orion. Orion, the Hunter, usually is easy to find from October through April. It is large and distinctive with two very bright stars—the reddish-orange giant Betelgeuse and bluish-white Rigel—as well as five other bright stars and several less visible ones. The Orion Nebula, a cloud of dust and gas several lightyears across, is visible to the naked eye as a fuzzy patch just below Orion’s belt.
-
Canis Major. Southeast of Orion is Canis Major, the Great Dog, which you can see from December through April. Sirius, the night sky’s brightest star, is a part of Canis Major. Orion’s three belt stars point downward toward Sirius.
-
Gemini. From December through May you can see Gemini, the Twins, northeast of Orion. Two bright stars, Castor and Pollux, are the heads of the Gemini twins. Auriga. Visible from November through April, Auriga, the Charioteer, is north of Orion. Capella, a double star in Auriga, is one of the brightest lights in the sky.
-
Taurus. Orion’s belt stars point up toward Aldebaran, a bright orange-red star. Aldebaran is the eye of Taurus the Bull, a constellation you can see from November through March.
WHAT ABOUT PLANETS?
Planets do not twinkle like stars do. Planets have a constant light. This is a good way to figure out whether you are looking at a star or a planet. Look for these planets:
-
Mercury is hard to see because it is always close to the sun.
-
Venus is white and very bright. When Venus can be seen, it is always right after sunset or right before sunrise, near the horizon.
-
Mars often looks red in the night sky.
-
Jupiter is bright yellow.
-
Saturn is also yellow but not as bright as Jupiter.
Our word for planet comes from the ancient Greek words asteres planetai, which means "wandering stars." The Greeks knew thousands of years ago that the planets slowly moved across the sky over time. If you look at the planets often, you may notice that they change their position in the sky a little bit every day.
AIRPLANES AND SATELLITES
You do not need a telescope to see satellites at night. Satellites look like small dots of lights moving in a steady path across the sky. Airplanes have white lights on top and colored blinking lights underneath so they are easy to spot.
METEOR SHOWERS
If you get lucky, you might see a streak across the night sky. The light is caused by bits of rock and dust called meteoroids that fall into Earth's atmosphere and burn up before they would hit Earth. These are also sometimes called falling stars. Every once in a while, a bit of space hits Earth. This is called a meteorite.
Nine major meteor showers happen every year. They last for several nights. If you go stargazing during a meteor shower, you may be able to see many falling stars in a single night.
EXPLORE THE NIGHT SKY
PICK A CLEAR NIGHT & HEAD OUTSIDE!
As a family, hold your own star party to observe the night sky! By holding your own observation session of the night sky you will complete advancements toward rank and enjoy the night with your family.
DRAW AND NAME YOUR OWN CONSTELLATION
If you could make your own constellation, what would it look like? What would your constellation be named?
Draw a picture of your constellation. Create a story about how your constellation got its name. Share your picture and story with the rest of the members of your family!


HOMEMADE CONSTELLATION

You can design and create a constellation of your own using materials you find
around your home. For example, you can make a constellation using a tin can, a
small nail, a bigger nail, and a hammer. Be sure to get help from an adult when
using tools!
Materials Needed:
-
Tin Can
-
1 small nail
-
1 bigger nail
-
A hammer
Instructions:
-
Mark dots on the bottom of an empty can in the shape of a constellation.
-
With the help from an adult, use the hammer and nails to punch holes. Use the smaller nail to make the hole and then the larger nail to make each hole larger.
-
Insert a flashlight in the top of the can.
-
Turn off the lights, turn on the flashlight, and point the bottom of the can towards a wall. The points of the constellation will light up!

BUILD & LAUNCH A ROCKET


BEFORE GETTING STARTED
Not all cities and towns permit model rocket launches. Check with your local fire department or police to find out about local regulars governing model rocket launches. You may have to travel to a rural area to find a launch site. You can also make a chemical reaction rocket!
CHEMICAL REACTION ROCKET
Demonstrate Newton's third law of motion. Make a paper rocket propelled by Alka-Seltzer and water or baking soda and vingear. Guaranteed fun for the whole family.
Materials Needed:
-
Paper cut to 5x8 inches or a large index card
-
Empty film canister with lid that snaps inside
-
Markers, crayons or colored pencils
-
Tape
-
Scissors
-
Alka-Seltzer tablets or baking soda (baking soda to use with vinegar)
-
Water or vinegar (vinegar to use with baking soda)
-
Ruler
Instructions:
-
Decorate the paper — get creative! This will form the body of your rocket.
-
Roll the paper into an 8-inch-tall tube. Slide the empty film canister into the tube so that the
canister opens at one end of the tube. Securely tape the paper to the canister. You do not
want these two parts to separate. -
Now, tape closed the 8-inch-long seam of the paper tube.
-
Cut two triangular paper fins and tape them onto the rocket.
-
Make a small paper cone and tape it to the top of the rocket if you would like a nose cone.
-
Hold the rocket upside down and add water to the canister to one-quarter full.
-
Add half a tablet of Alka-Seltzer or to the film canister and quickly snap on the lid.
-
Place the rocket on the ground, lid down. Stand back and count down while you are waiting
for launch.
.png)

.png)
BUILDING AND LAUNCHING A MODEL ROCKET
Model rocketry is a great way to learn about space exploration. The rocket you build won’t reach space, but the science and technology that goes into your rocket is the same as NASA uses in launching giant rockets. Model rockets are made of paper, balsa wood, plastic, glue, and paint. You build them with simple tools such as a modeling knife, sandpaper, scissors, rulers, and paintbrushes. Model rockets are powered by solid propellant rocket engines. Depending on the size and design of the rocket and the power of the engine, model rockets may fly only 50 feet high or up to a half mile in altitude. They are powerful, and through misuse could harm animals, people, or property. By following the rules below, you can launch your rockets in complete safety over and over.
BUILDING YOUR OWN ROCKET
If you have never built a model rocket before, it is best to start with a simple kit. The kit will consist of a body tube, nose cone, fins, engine mount, and parachute or some other recovery system that will gently lower your rocket to the ground at the end of its flight. Engines must be purchased separately from the rocket. Be sure to buy the recommended engines for your kit. If you use engines that are too powerful, you may lose your rocket on its first flight.


STABILITY-CHECKING YOUR ROCKET
Check every rocket for stability before flying it. Stability checks before launch assure you that your rocket will fly properly. Unstable rockets tumble in the air and may head back toward the launchpad at high speed. Stability checks are simple and require only a long piece of string, a piece of tape, and a few minutes of your time. To check a new model rocket, prepare the rocket for flight and insert a live engine. Tie a slipknot around the body of the rocket and slide it to the point where the rocket is perfectly balanced on the string. Hold the string in one hand over your head, and begin to twirl your rocket as though you were spinning a lasso. As the rocket picks up speed, gradually play out the string until the rocket is about 6 to 8 feet away. If you are not tall, you may want to stand on a chair at this point. If your rocket is stable, it will travel around you without tumbling. The nose cone will point into the air and the tail end will follow. If the tail end goes first or if the rocket tumbles, your rocket may be dangerous to fly. You can correct this situation by putting on larger fins or adding weight to the rocket’s nose with a lump of clay.
LAUNCHING YOUR ROCKET
When your rocket is ready for its first flight, you must choose a proper launching site. Your launching site should be a large field that is free of power and telephone lines, trees, buildings, or any other structures that might snag a returning rocket. Choose a field away from airports. You will need a launchpad. Perhaps you can borrow a launchpad from a local model-rocket club, or join the members on a day when they are launching rockets (To find a local club, see the National Association of Rocketry listing in the resources section.) If not, you can either buy a launchpad kit or build your own. A simple launchpad can be built from a block of wood, a blast deflector made from a flattened metal can, and a straight rod. Rods made specifically for rocket launchers are best and inexpensive. Buy one where you get your rocket supplies.
INSTRUCTIONS TO BUILD
While your model rocket will come with instructions, follow these instructions for a safe launch. Not all cities and towns permit model rocket launches. Check with your local fire department or police to find out about local regulations governing model rocket launches. You may have to travel to a rural area to find a launch site. Or you may choose to make an alternative rocket.
Your launch system should be electric. It must have a switch that closes only when you press it and then opens again automatically. It also should have a master switch, or you should be able to disconnect the batteries while you set up your next flight. The wires from your batteries (about 6 volts) should extend about 15 feet to small “alligator” clips at the ends. These clips will be attached to the wires of the igniter. Never use fuses or matches to ignite your rocket .
ACCOMPLISHING A LAUNCH OBJECTIVE
After you have made your first launch, make a second launch with a specific objective in mind. You might try to spot-land the rocket within a 50-foot circle. That isn’t as easy as it sounds. You must make allowances for wind drift and aim your rocket accordingly.
Another objective might be to carry a payload aloft and recover it safely. Several rocket kits come with payload sections for carrying hard-boiled eggs or other cargo. Still another objective would be to launch a small camera on your rocket to take a picture of the launch site from high altitude. Specially designed cameras are available for model rockets.
FLY PAPER AIRPLANES
Create and fly paper airplanes!
Paper airplanes are light. This helps them fly through the air when you use the power in
your muscles to propel them. But a real airplane is heavy. How does anything that big stay
in the air?
Airplanes need to have lift to fly. Scientists explain lift with an idea called Bernoulli's
Principle. As planes travel through the air, air travels over the wings. The shape of the
wings makes the air travel faster over the top than beneath them. The difference in the air
speeds create higher pressure beneath the wings than above them. The pressure difference causes the wing to push upward, creating lift. The faster the plane moves through the air, the more air is forced under and over the wings, creating more lift.
ARROW
-
Place a sheet of paper on a table. Fold the paper hot dog style.
-
Unfold and then fold the corners into the center line.
-
Fold the top edges to the center.
-
Fold the plane in half.
-
Fold the wings down to meet the bottom edge of the planes body.
.jpg)

Learn how to build an Estes Gnome Rocket with Scoutmaster Robbie White from Billings, Montana!


Now make a paper airplane catapult!
Have you ever seen pictures of a fighter jet being launched from an aircraft carrier? Because the ship has a short runway, the flight deck crew hooks the jet to a catapult to fling it into the sky.
Materials Needed:
-
Your favorite paper airplane you made
-
A rubberband
-
A pencil
-
A hole punch
Instructions:
-
Make a hole near the nose of your favorite airplane design using a single hole punch.
-
Loop a rubberband into the hole.
-
Launch your plane using a pencil or your finger with the rubberband.


Below you will find details on connected advancements for this week's challenge.
If there is a Trail Waypoint next to the advancement, that means you fully earn this adventure along The Trail! Here you will find connected worksheets, tracking tools, and full details on how to complete the adventure.


TRAIL WAYPOINTS
FOR CUB SCOUTS
LIONS - Current Kindergarteners (as of April 2021)
-
Mountain Lion (Required Adventure) - Get prepared for an outing and show what you need to do to get ready for this adventure.
TIGERS - Current 1st Graders (as of April 2021)
-
Sky is the Limit (Elective Adventure) - Explore the night sky with your family or den! Create your own constellation and share your constellation with someone else.
-
*COMING SOON* Cyber Summer Camp Beyond is coming back for another summer! This adventure will be featured this summer to fully earn with a 5-day digitally delivered STEM Camp right here on HomeScouting.org.
-
WOLVES - Current 2nd Graders (as of April 2021)
-
Air of the Wolf (Elective Adventure) - Experiment with air! Try science investigations, make a paper airplane, and more!
-
Motor Away (Elective Adventure) - Learn how things are powered and experiment with creating paper airplanes and model boats.
-
*COMING SOON* Cyber Summer Camp Beyond is coming back for another summer! This adventure will be featured this summer to fully earn with a 5-day digitally delivered STEM Camp right here on HomeScouting.org.
-
BEARS - Current 3rd Graders (as of April 2021)
-
Bear Necessities (Required Adventure) - Go on a backyard campout to look at the stars!
WEBELOS & ARROW OF LIGHTS - Current 4th & 5th Graders (as of April 2021)
-
Adventures in Science (Elective Adventure) - Explore the world of science by conducting experiments, learn about physics, build and launch a model rocket and more.
-
*COMING SOON* Cyber Summer Camp Beyond is coming back for another summer! This adventure will be featured this summer to fully earn with a 5-day digitally delivered STEM Camp right here on HomeScouting.org.
-
FOR SCOUTS BSA & VENTURING
While you'll need to work with your troop leadership to fully complete the rank requirements below, you can practice while completing this week's challenge!
SCOUT RANK
-
Work on the Exploration Merit Badge along The Trail!
-
*COMING SOON* Cyber Summer Camp Beyond is coming back for another summer! This 5-day digitally delivered STEM Camp will right here on HomeScouting.org and features Space Exploration, Robotics, and Astronomy Merit Badge!
TENDERFOOT RANK
-
Work on the Exploration Merit Badge along The Trail!
-
*COMING SOON* Cyber Summer Camp Beyond is coming back for another summer! This 5-day digitally delivered STEM Camp will right here on HomeScouting.org and features Space Exploration, Robotics, and Astronomy Merit Badge!
SECOND CLASS RANK
-
Work on the Exploration Merit Badge along The Trail!
-
*COMING SOON* Cyber Summer Camp Beyond is coming back for another summer! This 5-day digitally delivered STEM Camp will right here on HomeScouting.org and features Space Exploration, Robotics, and Astronomy Merit Badge!
FIRST CLASS RANK
-
Work on the Exploration Merit Badge along The Trail!
-
*COMING SOON* Cyber Summer Camp Beyond is coming back for another summer! This 5-day digitally delivered STEM Camp will right here on HomeScouting.org and features Space Exploration, Robotics, and Astronomy Merit Badge!
STAR AND LIFE RANKS
-
Work on the Exploration Merit Badge along The Trail!
-
*COMING SOON* Cyber Summer Camp Beyond is coming back for another summer! This 5-day digitally delivered STEM Camp will right here on HomeScouting.org and features Space Exploration, Robotics, and Astronomy Merit Badge!

FOR PARENTS AND ADULT LEADERS
ABOUT YOUTH PROTECTION TRAINING
Concern for youth safety has been ingrained in the Boy Scouts of America’s DNA since the beginning. True youth protection can be achieved only through the focused commitment of everyone in Scouting. It is the mission of Youth Protection volunteers and professionals to work within the Boy Scouts of America to maintain a culture of Youth Protection awareness and safety at the national, regional, area, council, district, and unit levels.
Before any adult can be registered with the Boy Scouts of America, they must fill out an application, take Youth Protection Training, and go through a Background Check.
HOW ARE ADULT LEADERS SELECTED?
The Boy Scouts of America takes great pride in the quality of our adult leadership. Being a leader in the BSA is a privilege, not a right. The quality of the program and the safety of our youth members call for high-quality adult leaders.
The Boy Scouts of America (BSA) has a multilayered adult leader selection process that includes criminal background checks administered by a nationally recognized third party and other screening efforts.
STEP 1: Application
All adults who have been selected as potential leaders of youth by a chartered organization must provide references, past addresses, other community affiliations and affirm that they have had no criminal accusations made against them.
STEP 2: Youth Protection Training
No person can become a registered leader in Scouting without first completing the BSA’s Youth Protection Training, and all registered adult volunteers are required to complete the training every two years. The training is available online 24 hours a day, seven days a week and is regularly updated to include the latest strategies for recognizing, responding to and preventing abuse.
STEP 3: References
Every potential volunteer is asked to provide local references from within the community they seek to serve. Chartered organizations (civic groups, schools, etc.), which establish Scouting units and provide local insight and ongoing supervision, are responsible for reviewing each application and determining which potential volunteers to move forward to the next phase of the leader selection process.
STEP 4: Criminal Background Checks
The BSA requires criminal background checks for all Scouting leaders. The background checks are administered by a nationally recognized third party that also provides this service to many local, state and federal governments; educational institutions; and other nonprofits.
STEP 5: Volunteer Screening Database Check
Before an applicant can join or volunteer with Scouting, the BSA verifies that he or she is not included in our database of individuals who have been prohibited from participation. The Volunteer Screening Database is in place to prevent the registration of individuals who do not meet the BSA’s standards due to known or suspected abuse or misconduct within or outside of the organization.
HOW TO TAKE YOUTH PROTECTION TRAINING
Taking Youth Protection Training is easy and takes about one hour to complete. Follow the instructions below for how to access Youth Protection Training in the Boy Scouts of America's Learn Center.
-
Log on to my.scouting.org or create an account if you don't have one already.
-
On the opening page of my.scouting.org, click on the Youth Protection logo for English or Spanish.
-
Once inside the BSA Learn Center, you have access to hundreds of BSA training modules! Scroll down to find Youth Protection Training under programs, and click on Youth Protection Training.
-
Click on Mandatory - Youth Protection Training.
-
Now, click on Enroll to add Youth Protection Training to your My Learning Center.
-
After clicking enroll, all 4 modules within Youth Protection Training now say "Start" to begin each module.
-
After watching each module, take the final quiz for the training.
-
You can also find each of these trainings that you add to your My Learning Center by clicking on My Learning Center at the top of the page.
FIND SUPPLEMENTAL TRAINING AT LEADSCOUTING.ORG


